
We have implemented an embedded laboratory which is inspired of Curiosity's which carry many spectrometers (laser, alpha ray X), a meteorological station, the SAM to study organic composition and Mars rocks and others sensors (neutrons for example).
We didn't have all the material of NASA but our aim is to implement a maximum of sensors which seem realisable and interesting for us. We have searched sensors whose specifications would be compatible with Mars'. A python code has been developed for 7 passive measurements.
Pressure and altitude are very important information on the environment. We have chosen the MPL311A2, compatible with Arduino ad Raspberry. We have implemented an Arduino Code in Python with the SparkFunMPL3115A2.h and Wire.h (for I2C) libraries. This component makes pressure measurements and sends the altitude value thanks to the formula:

with p, the measured pressure, p0, the sea level pressure given by the user and OFF_H an offset n meter also given by the user.
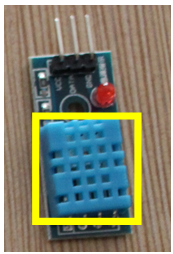
It has also an embedded thermometer whose accuracy is about ±1°C. Don't forget its use on Mars would have implied another referential so a different processing of the sensor values than on Earth.
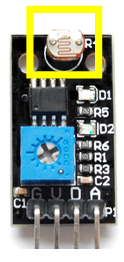
In order to get statistics on the amount of sunshine on Mars depending on seasons for example we have found interesting to implement a light sensor, the Ugear light sensor module compatible with Arduino and Raspberry. It's composed of a photo resistor, a potentiometer and a comparator LM393. The concept is simple: the more intense the light is, the higher the resistor value is going to be. The light's threshold can be modified thanks to the potentiometer (if we turn it clockwise, the sensor will be more sensitive and the threshold will be lower).
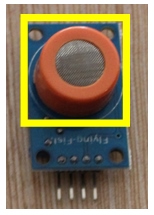
The CO (carbon monoxide) rate is not the principal compound of Mars's atmosphere (0.06%) but MQ-7 belongs to a family of sensors whose functioning is the same as MQ-8 for hydrogen or MG811 for carbon dioxide in majority on Mars (96%). It gives a ratio between 2 resistors and we deduce the carbon monoxide concentration thanks to the formula: ppm = 37143*(ratio ^-3.178).
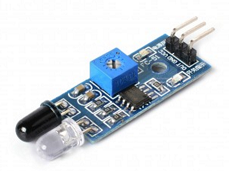
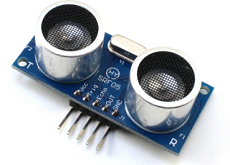
For obstacles and distance, we have hesitated between 2 different technologies: ultrasounds or infrared.
| IR: FC-51 | Ultrasounds: SFR05 |
 |
 |
| Detection: 2 to 30cm | Detection: 2 to 450 cm |
| Exactitude: depend on the distance (close to far) | Exactitude: about 2 mm |
| Detection cone: 35° | Very evasive |
| Size: 4.34 cm² | Size: 675 cm² |
| Shows if there is an obstacle closer to the sensor than a distance defined thanks to a potentiometer |
Gives the distance to the obstacle is situated |
The Rover must detect remote obstacles even if it has a slow motion (1 to 40 cm/s) because our aim is to make the rover autonomous. Firstly, we have been interested on the IR sensor which sends a Boolean (true or false) if there is an obstacle closer to the sensor than a distance defined by a potentiometer. The IR sensor will be put around the main box and the arm to stop the motion if there is a danger. Secondly, we have implemented the ultrasound detector with Ping.h library.
Test: we have put an obstacle (our hand) at different measured distance with a meter and we have found coherent results.
We have also used a gyroscope with the Wire.h library to get the rover's position which is a very important data for motion, acceleration and gear. We have been interested on angles which define the sensor position.
To measure the radioactive radiation quantity, we have used a Geiger counter, compatible with Arduino, which is equipped of a gas tube (helium, argon, neon).
Curiosity uses 4.8kg of plutonium dioxide but in the same time its electrical power (around 100W) is produced by solar panels. Our rover is for the time being supplied by a 12V lead battery but in future, we plan to add solar panels to transform the solar energy in supply for the rover or analysis.
How to choose the material? In which ranges do they work? It has taken a long time to look for the right sensor and understand which one would be the most appropriated. The material list (price and website) is available on this excel. All the pin numbers are written on wires to help us understand and fix more rapidly if it's needed.
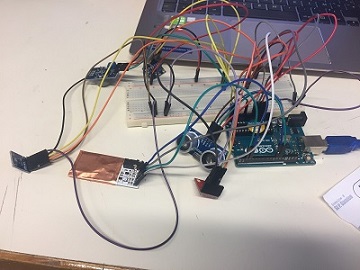
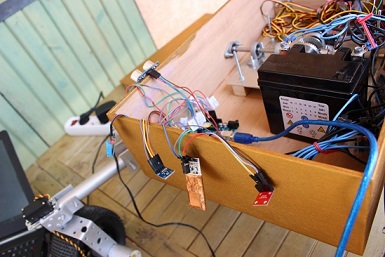
The aim is to introduce sensors and make them work together with a unique Arduino function. The first step was to test each of the component independently and then all of them together. To be sure of the coherence with the measurements displayed we have compared them with references displaying them on the terminal. The flexible and modulable code (structure based on a switch) gives the possibility to add or change a sensor easily because they correspond to a number. This number is delivered by a serial transmission. We can imagine to put new components like spectrometer, laser, solar panels, GPS or more accurate sensors for example.
Code: Arduino Sensors