
This is not a tutorial, but a step by step walkthrough done by Lakmal Gunasekara on how to install OpenGL and Glut under Solaris. Lakmal has kindly ported most of the OpenGL tutorials I've done to both Irix and Solaris. I hope everyone enjoys the ports.
If you'd like to port the code to another OS or Language, please contact me, and let me know. Before you start porting, keep in mind that I'd prefer all the code to be ported, rather than just a few of the tutorials. That way, people learning from a port can learn at the same rate as the VC guys.

This is not a tutorial, but a step by step walkthrough done by Tony Parker on how to install OpenGL and Glut under Mac OS. Tony has kindly ported the OpenGL tutorials I've done to Mac OS with GLUT. I hope everyone enjoys the ports.
I know alot of people have asked for Mac ports so support Tony by telling him how much you enjoy the ports. Without his work converting the projects there wouldn't be a Mac port.

In this tutorial, I will teach you how to set up, and use OpenGL in a Windows environment. The program you create by the end of this tutorial will create an OpenGL window, switch the computer into fullscreen mode, and wait for you to press ESC to exit. It doesn't sound like much, but this program will be the framework for every other tutorial I release in the next while.
It's very important to understand how OpenGL works, what is involved in creating an OpenGL window, and how to write simple easy to understand code. You can download the code at the end of the tutorial, but I definitely recommend you read over the tutorial at least once, before you start programming in OpenGL.

Using the source code from the first tutorial, we will now add code to create a Triangle, and a Square on the screen. I know you're probably thinking to yourself "a triangle and square... oh joy", but it really is a BIG deal. Just about everything you create in OpenGL will be created out of triangles and squares. If you don't understand how to create a simple little triangle in Three Dimensional space, you'll be completely lost down the road. So read through this chapter and learn.
Once you've read through this chapter, you should understand the X axis, Y axis and Z axis. You will learn about translation left, right, up, down, into and out of the screen. You should understand how to place an object on the screen exactly where you want it to be. You will also learn a bit about the depth buffer (placing objects into the screen).

Expanding on the second tutorial I will teach you how to create spectacular colors in OpenGL with very little effort. You will learn about both flat coloring and smooth coloring. The triangle on the left uses smooth coloring. The square on the right is using flat coloring. Notice how the colors on the triangle blend together.
Color adds alot to an OpenGL project. By understanding both flat and smooth coloring, you can greatly enhance the way your OpenGL demos look.

Moving right along. In this tutorial I'll teach you how to rotate both the triangle and the quad. The triangle will rotate on the Y axis, and the quad will rotate on the X axis. This tutorial will introduce 2 variables. rtri is used to store the angle of the triangle, and rquad will store the angle of the quad.
It's easy to create a scene made up of polygons. Adding motion to those object makes the scene come alive. In later tutorials I'll teach you how to rotate an object around a point on the screen causing the object to move around the screen rather than spin on its axis.

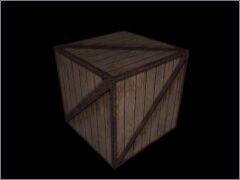
Now that we have setup, polygons, quads, colors and rotation figured out, it's time to build 3D objects. We'll build the objects using polygons and quads. This time we'll expand on the last tutorial, and turn the triangle into a colorful pyramid, and turn the square into a solid cube. The pyramid will use blended colors, the cube will have a different color for each face.
Building an object in 3D can be very time consuming, but the results are usually worth it. Your imagination is the limit!
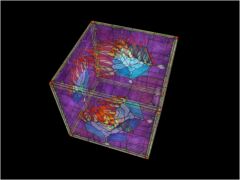
You asked for it, so here it is... Texture Mapping!!! In this tutorial I'll teach you how map a bitmap image onto the six side of a cube. We'll use the GL code from lesson one to create this project. It's easier to start with an empty GL window than to modify the last tutorial.
You'll find the code from lesson one is extremely valuable when it comes to developing a project quickly. The code in lesson one sets everything up for you, all you have to do is concentrate on programming the effect(s).
Ok, I hope you've been understanding everything up till now, because this is a huge tutorial. I'm going to attempt to teach you 2 new ways to filter your textures, simple lighting, keyboard control, and probably more :) If you don't feel confident with what you've learned up to this lesson, go back and review. Play around with the code in the other tutorials. Don't rush. It's better to take your time and learn each lesson well, than to jump in, and only know enough to get things done.
There was a reason for the wait. A fellow programmer from the totally cool site Hypercosm, had asked if he could write a tutorial on blending. Lesson eight was going to be a blending tutorial anyways. So the timing was perfect! This tutorial expands on lesson seven. Blending is a very cool effect... I hope you all enjoy the tutorial. The author of this tutorial is Tom Stanis. He's put alot of effort into the tutorial, so let him know what you think. Blending is not an easy topic to cover.
This tutorial covers a few of the topics you guys had requested. You wanted to know how to move the objects you've made around the screen in 3D. You wanted to know how to draw a bitmap to the screen, without the black part of the image covering up what's behind it. You wanted simple animation and more uses for blending. This tutorial will teach you all of that. You'll notice there's no spinning boxes. The previous tutorials covered the basics of OpenGL. Each tutorial expanded on the last. This tutorial is a combination of everything that you have learned up till now, along with information on how to move your object in 3D. This tutorial is a little more advanced, so make sure you understand the previous tutorials before you jump into this tutorial.
The tutorial you have all been waiting for! This tutorial was made by a fellow programmer named Lionel Brits. In this lesson you will learn how to load a 3D world from a data file, and move through the 3D world. The code is made using lesson 1 code, however, the tutorial web page only explains the NEW code used to load the 3D scene, and move around inside the 3D world. Download the VC++ code, and follow through it as you read the tutorial. Keys to try out are [B]lend, [F]iltering, [L]ighting (light does not move with the scene however), and Page Up/Down. I hope you enjoy Lionel's contribution to the site. When I have time I'll make the Tutorial easier to follow.
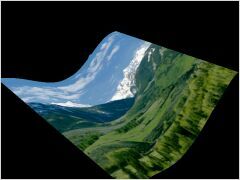
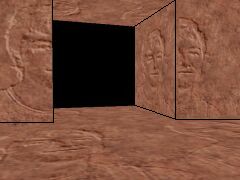
This tutorials brought to you by Bosco. The same guy that created the totally cool mini demo called worthless. He enjoyed everyones reaction to his demo, and decided to go one step further and explain how he does the cool effect at the end of his demo. This tutorial builds on the code from lesson 6. By the end of the tutorial you should be able to bend fold and manipulate textures of your own. It's definitely a nice effect, and alot better than flat non moving textures. If you enjoy the tutorial, please email bosco and let him know.

Want to know how to speed up you OpenGL programs? Tired of writing lots of code every time you want to put an object on the screen? If so, this tutorial is definitely for you. Learn how to use OpenGL display lists. Prebuild objects and display them on the screen with just one line of code. Speed up your programs by using precompiled objects in your programs. Stop writing the same code over and over. Let display lists do all the work for you! In this tutorial we'll build the Q-Bert pyramids using just a few lines of code thanks to display lists.
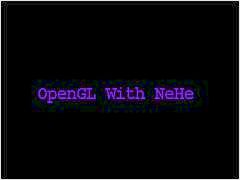
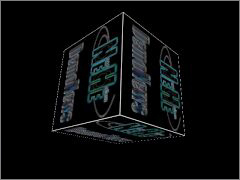
I think the question I get asked most often in email is "how can I display text on the screen using OpenGL?". You could always texture map text onto your screen. Of course you have very little control over the text, and unless you're good at blending, the text usually ends up mixing with the images on the screen. If you'd like an easy way to write the text you want anywhere you want on the screen in any color you want, using any of your computers built in fonts, then this tutorial is definitely for you. Bitmaps font's are 2D scalable fonts, they can not be rotated. They always face forward.
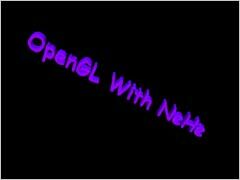
Bitmap fonts not good enough? Do you need control over where the fonts are on the Z axis? Do you need 3D fonts (fonts with actual depth)? Do you need wireframe fonts? If so, Outline fonts are the perfect solution. You can move them along the Z axis, and they resize. You can spin them around on an axis (something you can't do with bitmap fonts), and because proper normals are generated for each character, they can be lit up with lighting. You can build Outline fonts using any of the fonts installed on your computer. Definitely a nice font to use in games and demos.