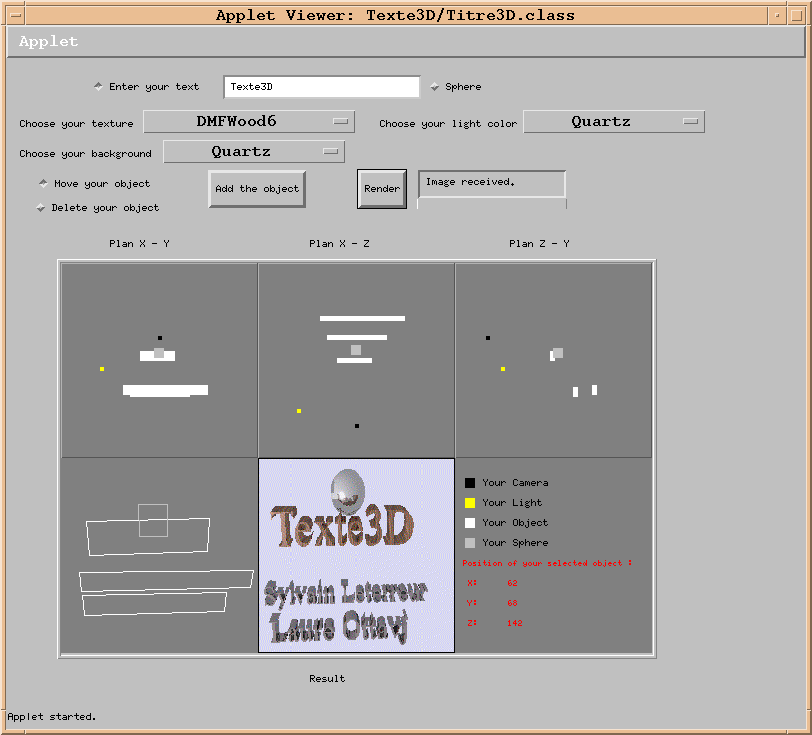
Here's the look of the interface:


Description ...

The interface can be divided into five parts: The following chapter explains how to use the interface.

Notice ...

Rules are easy to understand. The only thing you have to do is: At first, you have to choose "Enter your text". Then, you can enter your text in the text area.
You can now choose your object's texture in the list "Choose your texture". It is not necessary to choose now the background of your image, but don't forget it !
If you want to visualize your object in the different zones, you have to click on the "Add the object" button. Once this is done, you can manipulate your object the way you want, or add more object. Just as a remarq, it is not possible to change the object's texture now that it has been added. If you want to do so, you can delete it  and add a new one.
 
  To add a sphere, choose"Sphere", choose its texture and click on the "Add the object" button to get it displayed. Choose where you want to put it in your image by moving it in the different zones.
If you realise that the texture you have chosen is not the right one,   delete it  and add a new one.
It is not possible to change the sphere's height. The only thing you have to do is select"Move your object", and move it in the three zones at the top of the display zone.
You can move all the objects which have been added to the image, but you can also move the camera as well as the light source. It is also easy to delete an object. The only thing you have to do is select the"Delete your object", button and select the object you want to delete in one of the three zone at the top of the display zone.
Remarque: The camera and the light source can't be deleted. It is not possible to get it changed once the object has been added in your image. The only thing to do is to delete it , and add a new object (  text or  sphere  ). Once all the objects you want to visualize have been added and well placed, click on the "Render" button. A message is displayed near the button, and you can see the state of your image calculation thanks to the progress bar
You can use the applet during the image calculation, but you can't launch an other calculation before the last one is fnished.
Different messages are displayed in the message zone near the Render button to help the user.

For those interested in how our program is structured, let's have a look  ...


Laure Ottavj
Sylvain Leterreur

Last modified: Fri Apr 3 17:53:11 DST 1998